After you’ve been riding your longboard for a while, you’ll notice some wear and tear around the nose and tail. It happens! Scratches, nicks and chips are most common on your longboard’s nose and tail areas – and it can be frustrating. The good news is there’s so many awesome ways to protect your investment that don’t cost much money.
2 Best longboard nose guards
Not everybody has time to go to a hardware store and get the supplies to craft their own nose guard. The good news is that you can grab one on Amazon, or wherever, and get it to your door in no time. For the folks who love convenience, here’s our awesome list:
[1] SENSIVO longboard nose guard

For the price and the quality, you can’t beat the SENSIVO guards. These guards are a combination of metal and rubber. This combo-pack is a new and improved version of their original line. The newer guards are thicker and stronger. Their chosen material combination is waterproof and collision-resistant which sounds weird but mainly means it can take a beating.
Despite the strong metal/rubber, it’s quite flexible and can be used on any type of longboard nose shape. Whether you have a cruiser, pintail, drop-through, or something else- this will work on your nose and tail.
These are super easy to put on and don’t involve any other tools or glues. All you have to do is just place it in the center of your nose or tail, press it tight and wrap the sides around your nose or tail. It’s pretty easy, works great, and you can’t beat the price – definitely check this one out.
[2] NoseJob – universal drop-thru longboard nose Guard

Our 2nd and last store-bought suggestion is only for the drop-through board riders. NoseJob makes it clear that their guard fits *most* drop through style longboards. So for a more universal appliation, go with our top pick. If you do however have a drop-through and want a super clean and effective solution- check these guys out.
The NoseJob will fit top-mount and drop-down style boards, which makes it a versatile approach. The guard is very stealthy since it mounts underneath your board, you won’t be seeing much of it. However, it’s likely all the protection you’ll need.
Unlike the SENSIVO, there’s a bit of hardware you’ll need to install this. Here’s how you do it:
- You’ll need 1/4″ or longer mounting hardware on the truck, we suggest 1.5″
- Remove the truck hanger, hardware nuts, and washers and leave your base plate and screws on the board.
- Add drop-through shock pads to dampen vibration.
- Slide the guard through the screws and as far forward as you can.
- Replace the washers and nuts back on and tighten.
- Finish truck assembly.
DIY longboard nose guards
You’ll notice that there really isn’t much to the store-bought nose guards. So you may be inclined to reverse-engineer them and create your own DIY solution. We’ve scoured the community for ideas and have hand selected the best ones below.
[1] Plastic tubing
The most common DIY nose guard hack is using some type of plastic tubing. You’ll see in the video below how easy and cheap this solution really is:
Here’s how you do it:
- Buy a few feet of plastic tubing at a hardware store
- Place the tube around your nose to determine the length you’ll need
- Mark the length and make your cut
- Cut the tube long-ways to open the tube up
- Stretch it open with your fingers
- Cut short slits short-ways all along the tube to make it flexible (watch the video for more detail on this step.
- Use a hole-punch to make 2 holes on each end.
- Place the guard on the nose of your board
- Use zip ties to fasten the holes to the board.
The steps make a lot more sense if you watch the whole video, but we did our best to transcribe it all for you!
A popular alternative to the hole punch/zip-tie fastening is to just use super-glue. It’s totally up to you, but obviously the first option won’t damage your board when you remove the guard.
When buying your tubing, think about what color you want. In the video he uses a clear tube which is a universal color. Though you may find that a black tube blends in better with your black grip tape/board.
There are so many types of tubing you can use, but try to find a thicker/durable plastic or rubber material. The sturdier the material, the safer your board is, so keep that in mind when browsing the hardware store.
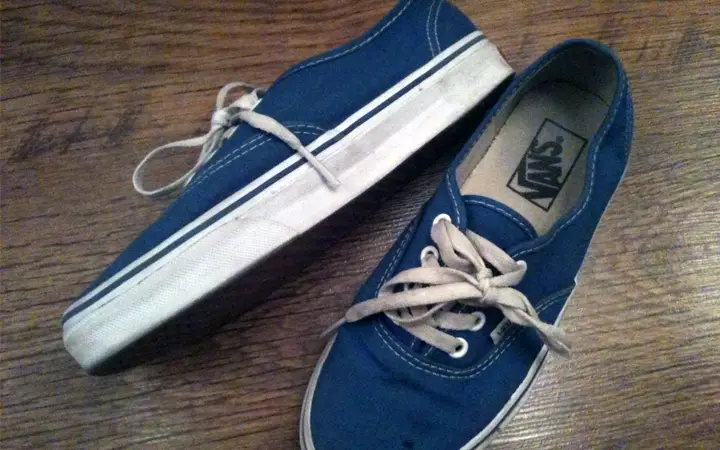
[2] The old shoe method
Skaters go through a lot of shoes, and a great way to recycle them is to repurpose them as noseguards!
All you have to do is take the rubber around the show, cut it from the shoe, and glue that onto the nose or tail of your longboard.
Do I need a noseguard for my longboard?
You do not need a nose guard, but think of it as a cheap insurance policy on your longboard investment. A common issue for riders is that the nose of their board gets chipped. Chunks are taken out of the wood and can deteriorate your board over time. For this reason we suggest making or buying a guard.
Longboards can cost upwards of $250, and even over $1,000 for an electric longboard. Even just taking our DIY advice can extend the life of your longboard.
Longboard nose guards are a practical accessory that can extend the life of your longboard.
The only downside to protecting your nose or tail is that some people think it takes away from the clean look of the board. Going with a black or clear guard can minimize the appearance of your guards.
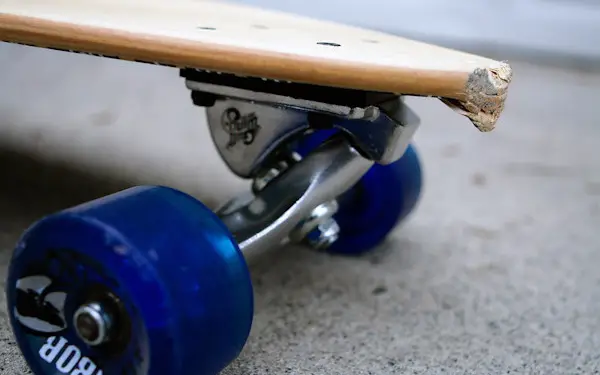
We consider the aesthetic sacrifice a small price to pay for protection. You don’t want your longboard to look like this:
![2 Best Longboard Nose Guards [+ DIY Solutions]](https://longboardingguide.com/wp-content/uploads/thumbs_dir/how-to-longboard-q104ad1ow2q7vgsseiw27sx9242d1rwxww8m293y2k.png)
![2 Best Longboard Nose Guards [+ DIY Solutions]](https://longboardingguide.com/wp-content/uploads/thumbs_dir/longboard-backpack-q1044ihud6pzmtamjzvmpa1zzsw55kp2fy3uk9s4sc.png)


